
BEHIND THE PRINT / DTFORDER
DTF. UV DTF.SUBLIMATION.HOW IT’S MADE.
Different products need different printing processes. Explore how we make apparel DTF transfers, UV DTF stickers, and sublimation prints—from the first ink layer to the final application. See where UV lamps, varnish, transfer film, paper, and controlled heat each fit.
START HERE / THREE METHODS
The right process for the right surface.
Apparel DTF, UV DTF stickers, and sublimation each start with digital artwork, but they use different inks, carriers, and finishing steps. Here is what changes from one method to the next.
| PRINT METHOD | PRINTED ON | HOW IT IS FINISHED | TYPICAL RESULT |
|---|---|---|---|
| Apparel DTF | Release-coated film | Adhesive powder is heat-cured, then the transfer is heat-pressed onto fabric. | A printed layer on a compatible garment. |
| UV DTF stickers | Adhesive print film | UV lamps cure white, color, and varnish; transfer film assists pressure application. | A raised printed design on a compatible hard surface. |
| Sublimation | Coated transfer paper | Controlled heat moves dye from the paper into polyester or a suitable polymer coating. | Color within the receptive material, without a separate adhesive layer. |
01 / THE BUILDING BLOCKS
Four essentials. One finished transfer.
Our manufacturing process brings equipment, materials, and production experience together. The next sections follow standard DTF apparel transfers. Continue below for the separate UV DTF sticker and sublimation processes. Specialty products may have additional requirements.
Release-coated film
The film holds the artwork during printing, curing, handling, and positioning. Its release coating helps the carrier separate at the correct peel stage.
Color + white inks
Color inks form the artwork. White ink provides backing and opacity, helping designs remain visible on dark or colored garments. Our standard prints use a matte finish.
TPU powder
Thermoplastic polyurethane powder supplies the heat-activated bond to fabric. It is applied to the wet print, then heated during curing.
Printer + curing oven
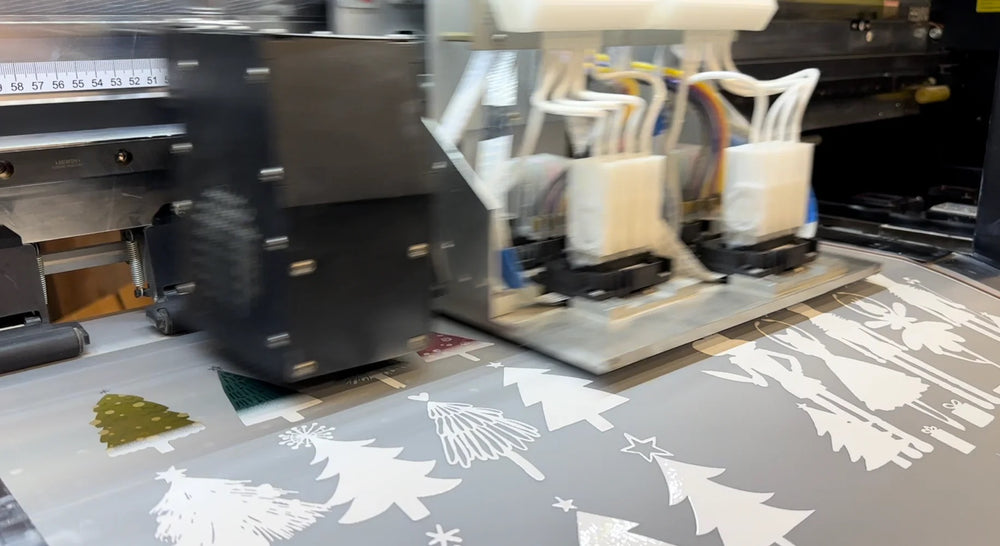
The printer places the ink; the powder equipment distributes adhesive; controlled heating prepares the printed sheet for transfer application.
02 / FOLLOW YOUR DESIGN
From your file to the finished garment.
The first five stages produce a transfer you can receive and store. The final stage applies that transfer to your garment. Understanding both helps you get a better result from the artwork you submit.
Artwork & RIP setup
THE DIGITAL STARTYour submitted design is prepared in RIP software, which translates the file into the printer’s color and white-ink instructions. Print size, output settings, and the white backing are part of this production setup.
Your part: submit final, print-ready artwork. Check spelling, backgrounds, proportions, and gang-sheet layout before checkout; request and obtain written approval for any design edits.
Color + white printing
THE IMAGE TAKES SHAPEThe design is printed in reverse onto release-coated transfer film. Color inks create the visible artwork; white ink provides a backing that helps the artwork show on colored garments.
Why it matters: white ink supports opacity. The printed image can look different from its final appearance while you are viewing it from the back of the film.
Adhesive powder
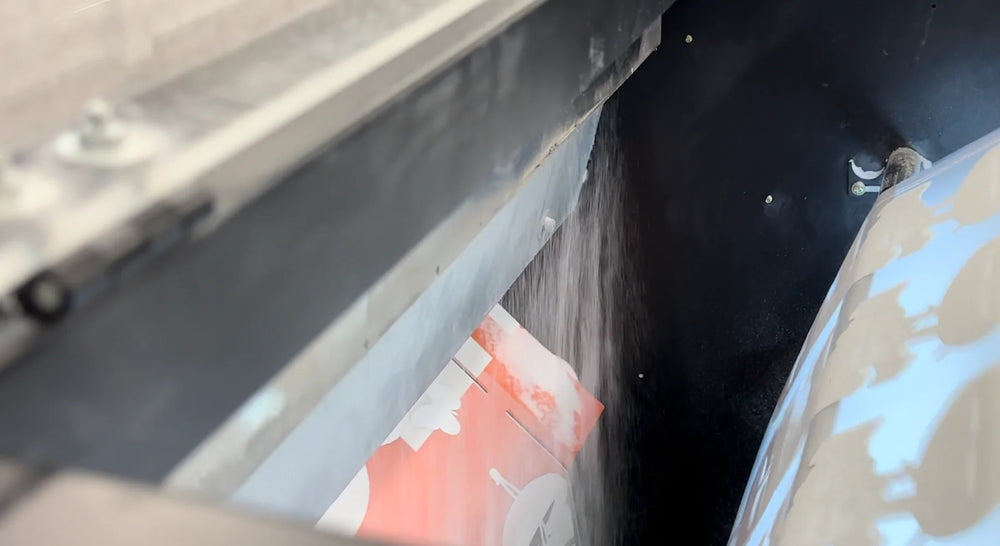
THE BONDING MATERIALDTF hot-melt powder is applied while the ink is still wet. It sticks to the printed areas, and excess powder is removed before the transfer moves into curing.
Why it matters: the powder becomes the heat-activated adhesive that bonds the design to fabric. It is a separate material from the white ink.
Controlled curing
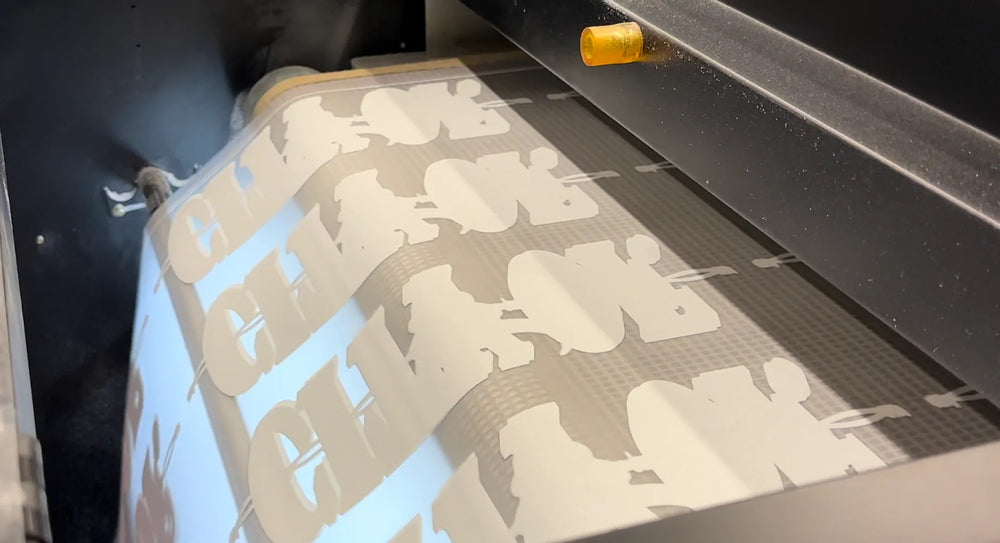
READY FOR THE NEXT STAGEThe powdered film passes through controlled heat so the adhesive melts and forms a transfer-ready layer. Time and temperature are matched to the materials and production equipment.
Why it matters: curing prepares the transfer for application. The garment still needs its own heat-press step; an oven setting is not a pressing instruction.
Inspection & packing
PREPARED FOR YOUR ORDERAfter curing, the transfers move through final inspection and order preparation. The finished sheets are packaged for the shipping or pickup method selected at checkout.
What you receive: a printed, cured transfer on its carrier film, ready to be applied according to the instructions for that product.
Press, peel & finish
THE FINAL STEP IS ON THE FABRICPosition the transfer with its adhesive side toward the garment and apply the recommended heat, time, and pressure. Peel the film at the correct stage for your transfer, then complete any required finishing press.
Get the settings: use our How to Press guide and the instructions supplied with your order. Fabric, press performance, and peel method all affect the result.
03 / INSIDE THE TRANSFER
Each layer has a purpose.
POSITIONED FOR PRESSING / SIMPLIFIED SIDE VIEW
White ink supports the color. Adhesive creates the bond.
These materials do different jobs. The white backing helps prevent the garment color from overwhelming the artwork. The hot-melt adhesive bonds the printed layers to the fabric when the transfer is correctly pressed.
The film carries the design through production and helps keep its elements positioned. It is removed at the peel stage; it is not intended to remain over the finished artwork.
Large areas of solid artwork create more continuous coverage than an open design with spaces. Artwork, materials, and application all influence the final feel.
04 / KNOW YOUR FILM
Hot, warm, or cold. Peel at the right moment.
Peel type describes when to remove the carrier after pressing. Your specific film and transfer instructions determine that timing. Our standard process uses hot-peel film; always follow the instructions for the product you actually ordered.
Remove while hot.
Peel at the hot stage specified in the product instructions. Follow any required finishing-press step afterward.
Let it cool briefly.
Allow the transfer to reach its specified warm-peel condition before lifting the carrier.
Wait until cool.
Allow the transfer to cool as instructed before removing the film. Peeling too early can interfere with the release.
Use the right pressing instructions. Cure settings and garment-press settings serve different stages. Visit How to Press for application guidance instead of using an oven temperature on your garment.
05 / START WITH A BETTER FILE
The print starts with what you upload.
FINAL SIZE.
A high-quality PNG with the intended transparent background is a useful starting point. Check the design at the dimensions you want printed.
- Check every word. Review spelling, numbers, names, and dates before you submit.
- Remove unwanted backgrounds. A white rectangle in the file can become part of the printed design.
- Match your selected size. Confirm proportions, print dimensions, and gang-sheet layout.
- Inspect small details. Fine lines, tiny text, shadows, and transparent effects may not reproduce as expected.
- Use a clean original. Simply changing a low-resolution file’s DPI setting does not restore missing detail.
Production preparation and design editing are separate services. Submit print-ready artwork. File corrections, background removal, resizing, and other edits require a specific request and written approval under our file and order policy.
06 / THE RESULT ON YOUR GARMENT
Good production. Correct application.
Artwork quality
Clean edges and suitable detail begin in the submitted design. Printer specifications alone cannot repair blurry artwork or a missing background removal.
Material control
Ink coverage, powder distribution, and curing each contribute to the finished transfer. Color on a backlit screen is a reference, not an exact promise of a printed match.
Pressing & care
Fabric choice, even pressure, temperature, time, peel timing, and garment care all affect the result. Use the instructions for your transfer and test unfamiliar fabrics.
Finished transfers can be kept for a later project. Protect them from moisture, heat, direct sunlight, folds, and dust. Our transfer storage guide explains how to organize and protect unused sheets.
07 / UV DTF STICKER PRODUCTION
White. Color. Varnish. Cured with UV light.
For UV DTF stickers, the artwork is built on adhesive film using white ink first, color second, and clear varnish over the design. UV lamps cure the printed inks. A separate transfer film is then laminated over the print to help lift and place the design on a compatible hard surface.
The printed layer sequence
- 01White foundationProvides an opaque base beneath the artwork.
- 02Color artworkCreates the visible shapes, images, and lettering.
- 03Clear varnishAdds the selected finish and a protective clear layer.
UV / UV-LED LAMPS
Cure the ink layers during the printer’s configured passes.
Three different jobs
- UV curing
- UV light triggers the ink’s hardening reaction. The printer’s lamps cure the printed layers during production.
- Clear varnish
- Varnish is a printed clear coating. It can influence gloss, texture, and resistance to surface wear, according to the selected ink and print mode.
- Transfer-film lamination
- Lamination applies the separate carrier film used to lift and position the design. That application film is peeled away after the design is transferred.
Prepare the adhesive film.
The print film and its adhesive surface are prepared for the selected system. Artwork and layer settings are set in the printer’s production software.
Build white, color, and clear.
The printer deposits the layers in sequence while UV lamps cure them during the configured printing passes. Clear varnish forms the top printed finish.
Add the transfer film.
The cured print is combined with its transfer carrier, commonly called B film, using the film system’s specified roller pressure and temperature settings. This keeps the separate design elements together for application.
Prepare the sticker for use.
The finished sheet is checked and prepared for the order. During application, remove the backing, position the design, burnish firmly, and peel the transfer film as instructed. The design and adhesive remain on the object.
The UV curing happens during production. Customers normally apply a finished UV DTF sticker with pressure, without a heat press or a UV lamp. Use a clean, dry, compatible surface, and follow the product’s application and care instructions.
Common uses: compatible glass, ceramic, metal, and rigid plastic items such as mugs, tumblers, bottles, acrylic pieces, and cases. Surface coatings and texture affect adhesion, so test unfamiliar materials. Follow our UV sticker care guidance, including hand washing where specified.
08 / SUBLIMATION PRINTING
Printed with precision. Transferred with heat.
Sublimation starts with specialist dye ink printed onto coated transfer paper. Controlled ink placement, a suitable color profile, and accurate print dimensions help reproduce the artwork. The dye is later transferred from the paper into polyester fibers or a sublimation-ready polymer coating using controlled heat.
The printed paper carries the dye.
The paper’s coating helps hold the ink for transfer. Colors can appear muted before heating; the sheet is an intermediate stage in the process.
Heat develops the finished print.
The dye transfers into the receptive material. There is no separate white-ink backing, varnish layer, or TPU adhesive powder in standard paper-transfer sublimation.
Simplified color illustration; final appearance depends on the artwork, ink, paper, coating or fabric, and transfer conditions.
Print onto specialist paper.
Artwork is prepared at the required size and mirrored where the product’s transfer method requires it. A sublimation printer places the dye ink onto the coated side of the transfer paper.
Let the print dry properly.
Paper must be dry enough to handle without smearing. Some production printers use a post-heater or drying unit to assist this step. Drying the paper alone does not complete the sublimation transfer.
Match the print to the blank.
Place the printed side against a suitable polyester fabric or coated blank. Hold the paper securely with the manufacturer-approved tape, wrap, or fixture to limit movement and unwanted double images.
Apply controlled heat.
A suitable heat press or sublimation oven drives the dye into the receptive material. Use the blank supplier’s time, temperature, pressure or wrap requirements, and removal and cooling instructions.
Flat heat press
Used for suitable flat products, including polyester fabric, coated panels, and compatible flat blanks. Contact, temperature, time, and even pressure work together during transfer.
Mug or tumbler press
A correctly sized curved heating attachment holds compatible drinkware against the transfer paper. The attachment and settings must match the blank.
Dedicated sublimation oven
Approved three-dimensional blanks can be heated with the printed paper secured around them, commonly using a compatible wrap. The oven supplies transfer heat; suitable fixtures maintain paper-to-product contact.
Where heaters and lamps fit. A printer heater helps dry ink on paper; a heat press or suitable oven transfers dye into the final product. UV lamps cure UV inks. A heating lamp by itself is not a universal substitute for the controlled sublimation setup specified for the blank.
Choose sublimation-ready materials. Standard sublimation works best with suitable white or light-colored polyester and polymer-coated blanks. Common examples include coated mugs, tumblers, keychains, photo panels, and coasters, plus polyester apparel and pillow covers. An ordinary uncoated mug or dark cotton shirt does not provide the same dye-receptive surface.
If you order printed sublimation transfers: the paper still needs the correct final heat-transfer step. Colors and print performance should be assessed on the compatible finished product, using the proper application conditions.
09 / QUESTIONS, ANSWERED
A closer look at the details.
Is clear varnish the same thing as lamination?
No. Clear varnish is printed and UV-cured as part of the design. Lamination adds the separate transfer film that helps position and apply a UV DTF sticker. That carrier film is removed during application.
Do sublimation prints need UV lamps?
Standard dye sublimation uses heat to move dye from printed paper into polyester or a compatible polymer coating. UV lamps are used to cure UV ink. Follow the press or oven process specified for the sublimation blank.
Why can sublimation colors look dull on paper?
The paper is a transfer carrier. The finished color develops during the correct heat-transfer process on the intended material. Use a compatible blank and the recommended settings when assessing the result.
Why is the back of my transfer white?
Standard DTF printing includes a white backing behind the color artwork. That backing helps the artwork show on colored garments. Viewing the back of a transfer is different from viewing the finished design after pressing and peeling.
Is the white ink also the adhesive?
No. White ink provides opacity behind the design. A separate hot-melt powder provides the adhesive layer. The powder is applied to the wet print and then heated during curing.
Will production preparation fix my artwork?
RIP setup prepares print data for the equipment. Please review your spelling, backgrounds, size, and layout yourself. Changes to the supplied design require a specific request and written approval.
Does a transfer need to be cut around every detail?
DTF avoids the contour weeding used with cut vinyl. If you ordered a gang sheet, you can separate individual designs by cutting through clear spaces between them; keep the artwork intact.
What products can I apply these transfers to?
Apparel DTF is used on suitable garments and fabric accessories, including cotton, polyester, and blends. Shirts, hoodies, and tote bags are common uses. Test heat-sensitive, coated, or unfamiliar materials and follow the transfer instructions.
Is this the process for UV DTF stickers too?
UV DTF follows the separate workflow above: white ink, color, and clear varnish are UV-cured on adhesive film, then combined with transfer film for application. The finished sticker is burnished onto a compatible hard surface; follow its own application instructions.
How quickly will my order be ready?
Turnaround depends on correct files, production capacity, and the order placed. Production and carrier delivery are separate stages. Review our shipping policy and current checkout options when planning a deadline.
10 / START YOUR NEXT PROJECT
Choose how to order your apparel DTF.
Build a gang sheet
Arrange multiple designs together using the online builder, then review the final layout before ordering.
Open the builderUpload a gang sheet
Already have a completed layout? Upload the print-ready sheet in the size you are ordering.
Upload your sheetOrder by size
Select individual transfer dimensions and quantities, and upload artwork that matches your selections.
Choose your size